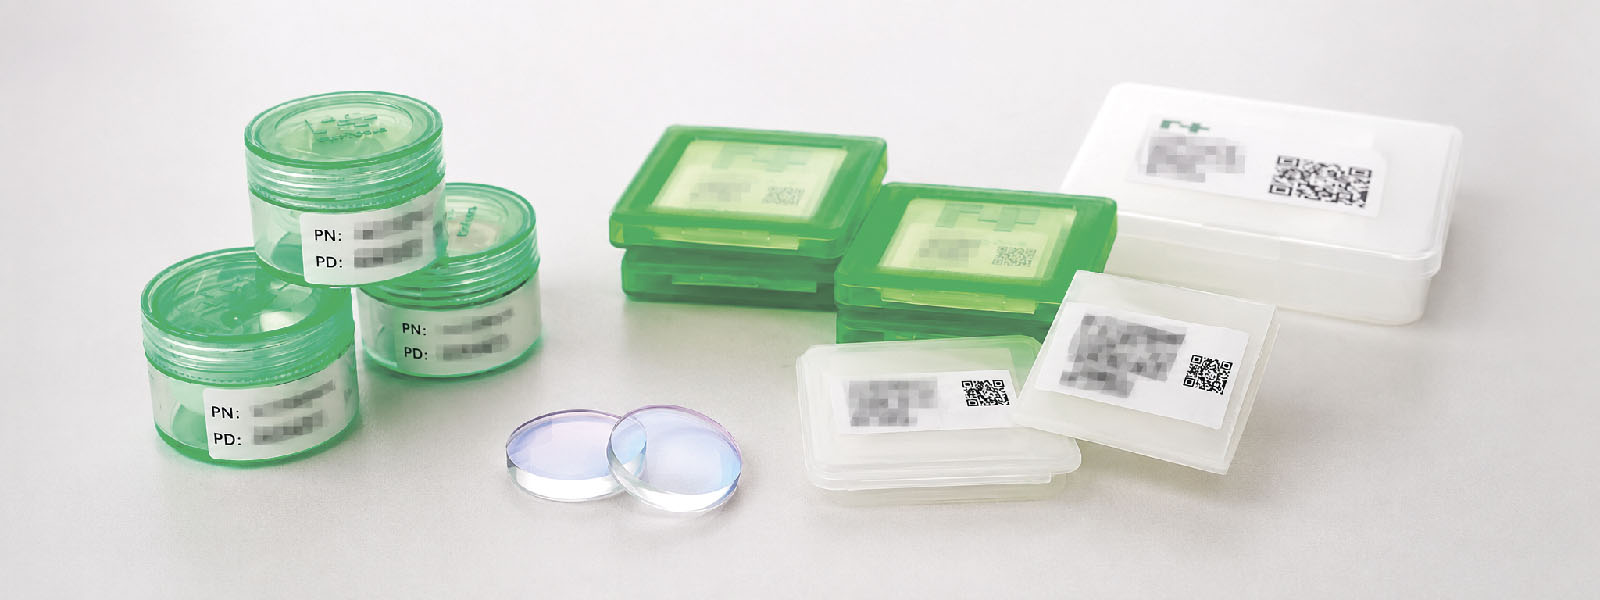
The protective window is a small optical part inside a laser cutting head. Its task is simple but very important: it protects the internal optics from dust, smoke, metal spatter and back reflection from the cutting process.
If the protective window becomes dirty, burned or damaged, cutting quality can become unstable. In some cases, continued cutting with a contaminated window can create a risk for more expensive optical components inside the head.
This article explains how to recognize protective window contamination, what usually causes it, and when cleaning is not enough.
Why the Protective Window Matters
A fiber laser cutting head works in a difficult environment. Near the cutting zone there is heat, vaporized metal, smoke, assist gas, reflected energy and small particles from the sheet surface.
The protective window acts as a barrier between this environment and the internal optical system. It is easier and cheaper to replace a protective window than to repair damaged internal optics.
If the window is clean and correctly installed, the beam can pass through it with minimal loss. If it is dirty or damaged, part of the laser energy may be absorbed by contamination. This can cause heating, power loss at the workpiece and unstable cutting.
For this reason, protective window inspection should be part of regular maintenance.
Main Signs of Protective Window Contamination
Protective window contamination does not always stop the machine immediately. Sometimes the machine still cuts, but the process becomes less stable.
Typical signs include:
- unstable piercing;
- more burr on the lower edge;
- rougher cut surface;
- wider or uneven kerf;
- reduced cutting speed at normal parameters;
- poor repeatability on the same material;
- frequent defects after several minutes of work;
- cutting quality improves after replacing the window.
If the machine becomes stable after window replacement, the protective window was probably one of the main causes.
Visual Signs on the Window
During inspection, the protective window may show different types of contamination.
Look for:
- dust particles;
- grey or brown stains;
- dark spots;
- burn marks;
- rainbow-like marks;
- cloudy areas;
- scratches;
- small cracks;
- damaged coating;
- melted particles on the surface.
Light dust may sometimes be cleaned with correct optical materials. Burn marks, deep spots, coating damage, cracks or scratches are different. In these cases, replacement is usually safer than cleaning.
Do not inspect only the center of the window. Contamination near the edge can also create heating, sealing problems or repeated contamination.
Common Causes of Contamination
Protective window contamination can come from several sources. Replacing the window without finding the cause may lead to the same problem again.
Back Spatter During Piercing
Piercing is one of the highest-risk stages. If molten metal or vapor moves back toward the nozzle, particles can reach the protective window area.
This can happen because of:
- wrong piercing parameters;
- too much energy during piercing;
- incorrect focus;
- wrong assist gas pressure;
- damaged nozzle;
- incorrect stand-off distance;
- thick or dirty material surface.
If the window becomes dirty quickly after piercing operations, check the piercing process before blaming the window itself.
Damaged or Wrong Nozzle
The nozzle controls assist gas flow. If the nozzle hole is damaged, off-center, dirty or the wrong type, gas flow can become unstable.
Poor gas flow can increase spatter and reduce melt removal. This may lead to more contamination inside the lower part of the cutting head.
Before replacing another protective window, inspect the nozzle.
Poor Gas Quality
Assist gas must be clean and stable. If compressed air is used, moisture, oil or particles can increase contamination risk. Gas leaks and unstable pressure can also affect the cutting process.
Check:
- pressure stability;
- filters;
- dryer condition;
- oil or water in the line;
- leaks at fittings;
- correct gas for the cutting program.
Dirty Material Surface
Rust, oil, paint, protective film residue, dust or scale on the sheet can create more smoke and particles during cutting. This increases contamination risk, especially during piercing and high-power cutting.
If contamination happens mainly with one material batch, check the sheet surface before changing many machine settings.
Poor Installation or Damaged Seals
The protective window must sit correctly in its holder or cartridge. If the seal is damaged, dirty or incorrectly installed, dust or gas flow may enter the wrong area.
Check the seal, holder, seating surface and cleanliness before installing a new window.
Cleaning or Replacement?
Not every dirty window must be replaced immediately, but not every window can be safely cleaned.
Cleaning may be possible when:
- contamination is light;
- there are no burn marks;
- there are no scratches;
- the coating is not damaged;
- the surface is not cloudy;
- correct optical cleaning materials are available.
Replacement is recommended when:
- there are burn marks;
- dark spots remain after correct cleaning;
- the coating looks damaged;
- the window is scratched or cracked;
- contamination is deep or baked onto the surface;
- cutting quality is unstable after cleaning;
- the same window has been cleaned many times.
Do not try to save a damaged protective window. It protects more expensive optical parts. If there is doubt, replacement is usually the safer decision.
Basic Inspection and Replacement Procedure
Use a clean and controlled procedure. Do not inspect or clean optics with dirty hands or in a dusty area.
Basic steps:
- Stop the machine safely.
- Let the head and parts cool down if needed.
- Remove the protective window holder according to the machine procedure.
- Wear clean gloves or finger cots.
- Inspect both sides of the window under good light.
- Check the holder, seal and seating area.
- Clean only if the contamination is light and cleaning is allowed.
- Replace the window if damage is visible.
- Install the window without touching the optical surface.
- Make a test cut and compare the result.
Never touch optical surfaces with bare fingers. Fingerprints can create local heating and contamination.
Before installing a new window, also check the nozzle, ceramic body, gas pressure, gas cleanliness, stand-off distance, piercing settings and holder condition.
Troubleshooting Table
| Symptom | What to check first |
|---|---|
| Window becomes dirty after piercing | Piercing parameters, nozzle, gas pressure |
| Dark spot in the center | Beam path, contamination, optical heating |
| Contamination near the edge | Seal, holder cleanliness, installation |
| Cutting quality drops after some time | Window heating, cooling, gas stability |
| Burr appears suddenly | Nozzle, protective window, gas pressure |
| Window gets dirty with one material only | Sheet surface, oil, rust, coating |
| New window gets dirty very quickly | Back spatter, wrong nozzle, gas or stand-off |
| Cleaning does not improve cutting | Replace window and inspect deeper causes |
This table gives first inspection points, not a final diagnosis.
Compatibility and Correct Selection
Protective window selection depends on the exact cutting head model. Different heads may use different window sizes, holders, cartridges and seals.
Before ordering or replacing a protective window, check:
- cutting head model;
- protective window size;
- holder or cartridge type;
- seal type;
- laser power;
- assist gas;
- main materials and thicknesses;
- machine cutting database;
- previous service history.
Do not select a protective window only by photo. Similar-looking windows may have different dimensions, thickness or compatibility.
Common Mistakes
Cleaning a burned window.
Cleaning cannot restore damaged coating or burned optical material.
Touching the surface by hand.
Fingerprints can absorb laser energy and create heating.
Installing a clean window into a dirty holder.
The new window can become contaminated immediately.
Ignoring the nozzle.
A damaged nozzle can increase back spatter and contaminate the window again.
Changing cutting parameters before inspection.
Sometimes the real cause is a dirty protective window, not the cutting program.
Using the wrong window size.
Incorrect size or thickness can create installation and optical problems.
Basic Replacement Rules
Use these simple rules:
- inspect the protective window regularly;
- do not continue cutting with a burned or cracked window;
- use clean gloves or finger cots;
- keep optical parts in sealed packaging;
- clean only with correct optical materials;
- check seals and holder condition;
- do not mix windows from different head models;
- make a test cut after replacement;
- record replacement date and reason;
- investigate repeated contamination.
A protective window is a consumable, but it is also a safety barrier for the internal optics. Treat it as a critical maintenance part.
Conclusion
Protective window contamination is one of the common causes of unstable laser cutting quality. It can affect piercing, edge quality, power delivery and repeatability.
Before changing many cutting parameters, inspect the protective window, nozzle, ceramic body, assist gas and piercing process. If the window is lightly contaminated, correct cleaning may be possible. If it has burn marks, deep contamination, scratches or coating damage, replacement is usually the safer decision.
Stable cutting depends not only on laser power and machine settings. It also depends on small routine checks that protect the optical system before serious damage appears.